Below are the stages I went through to complete my playground area.
I began modelling the fencing, I evenly distributed the fence posts to give a nice big area which would allow me to complete the playground.
I wanted a crooked fence so I decided to use three pieces of fencing in between each post and went around moving them in different directions, some I broke which gives the effect they have been destroyed. I am happy with the fencing.
I modelled the swings frame first to give me a good sizing before I modelled the chains and the seats.
It is difficult to see on this picture but my next step was to model the chains. I connected them altogether on one side and only half on the other, this is because I wanted one of the swings to be broken.
I added seats to the chains, this was so I could see how the broken chain would lay on the ground.
I was happy with the outcome of the swing set, referring to my storyboards and animatics I felt it looked as I saw it in the beginning stages of the project.
I added the swing set and the fencing together which gave me an idea of spacing for the other items in the playground. I positioned the swing set pretty much in the centre of the playground because I thought it would be the main thing to look at.

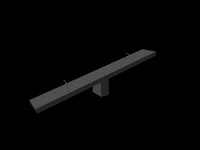
The seesaw is rather basic but I think it is quite effective and I think it will work well when the entire playground has been modelled.
I found the bins slightly tricky because the wooden planks were difficult to get in the correct places, however I am happy with the outcome.
I have nearly completed modelling all the items in the playground area. The only think left is the ground. I had a look at different playgrounds and noticed that not all the surfaces are on the same level. Underneath the swing set, the seesaw, the benches and even the pathway seem to be indented due to people treading there, so I thought it would be a good idea to do this in my playground to make it look more realistic.
This process was a long and challenging one because it was easy to catch the areas which needed to be higher but I managed it in the end and I am happy with the results.


No comments:
Post a Comment